
Students
Registration is where a student first enters ShuleOne. Everything downstream — billing, registers, marks, library loans, transport, the student portal — reads the record created here, so it is worth being fussy about accuracy at this point.
What’s new — 10 October 2026
Section titled “What’s new — 10 October 2026”The corrected ShuleOne Admin build loads the Students roster again when the school has active learners. The same correction restores the student picker in Others → Leave-outs → Issue leave-out. Install the updated Admin build when it is available if the mobile roster says Couldn’t load students while the web register works.
What’s new — 8 October 2026
Section titled “What’s new — 8 October 2026”The student register keeps Edit visible and moves the other actions into More
actions. Admissions staff can reset one learner’s portal password there to the default
1234@#, optionally texting the credentials and sign-in links to a linked parent.
What’s new — 29 September 2026
Section titled “What’s new — 29 September 2026”Every admitted learner’s portal Username is now shown immediately after saving and in the Students register. Open an existing learner to see the same read-only username. The Class List PDF and Excel report includes a Student Username column by default, ready to print for a class; untick it when the copy is for another purpose.
What’s new — 20 September 2026
Section titled “What’s new — 20 September 2026”Registration → Classes now shows every class’s Next class. Promote All checks the complete active-class progression first and does not move any students when a next class is missing, points back to itself, belongs to another school, is inactive, or is otherwise unsuitable. The warning names the classes to correct in Settings → Classes.
Go to Registration → Students.
In the ShuleOne Admin app, open the Students tab in Registration. Search by name or admission number, or use Others → Leave-outs to issue a leave-out for a learner.
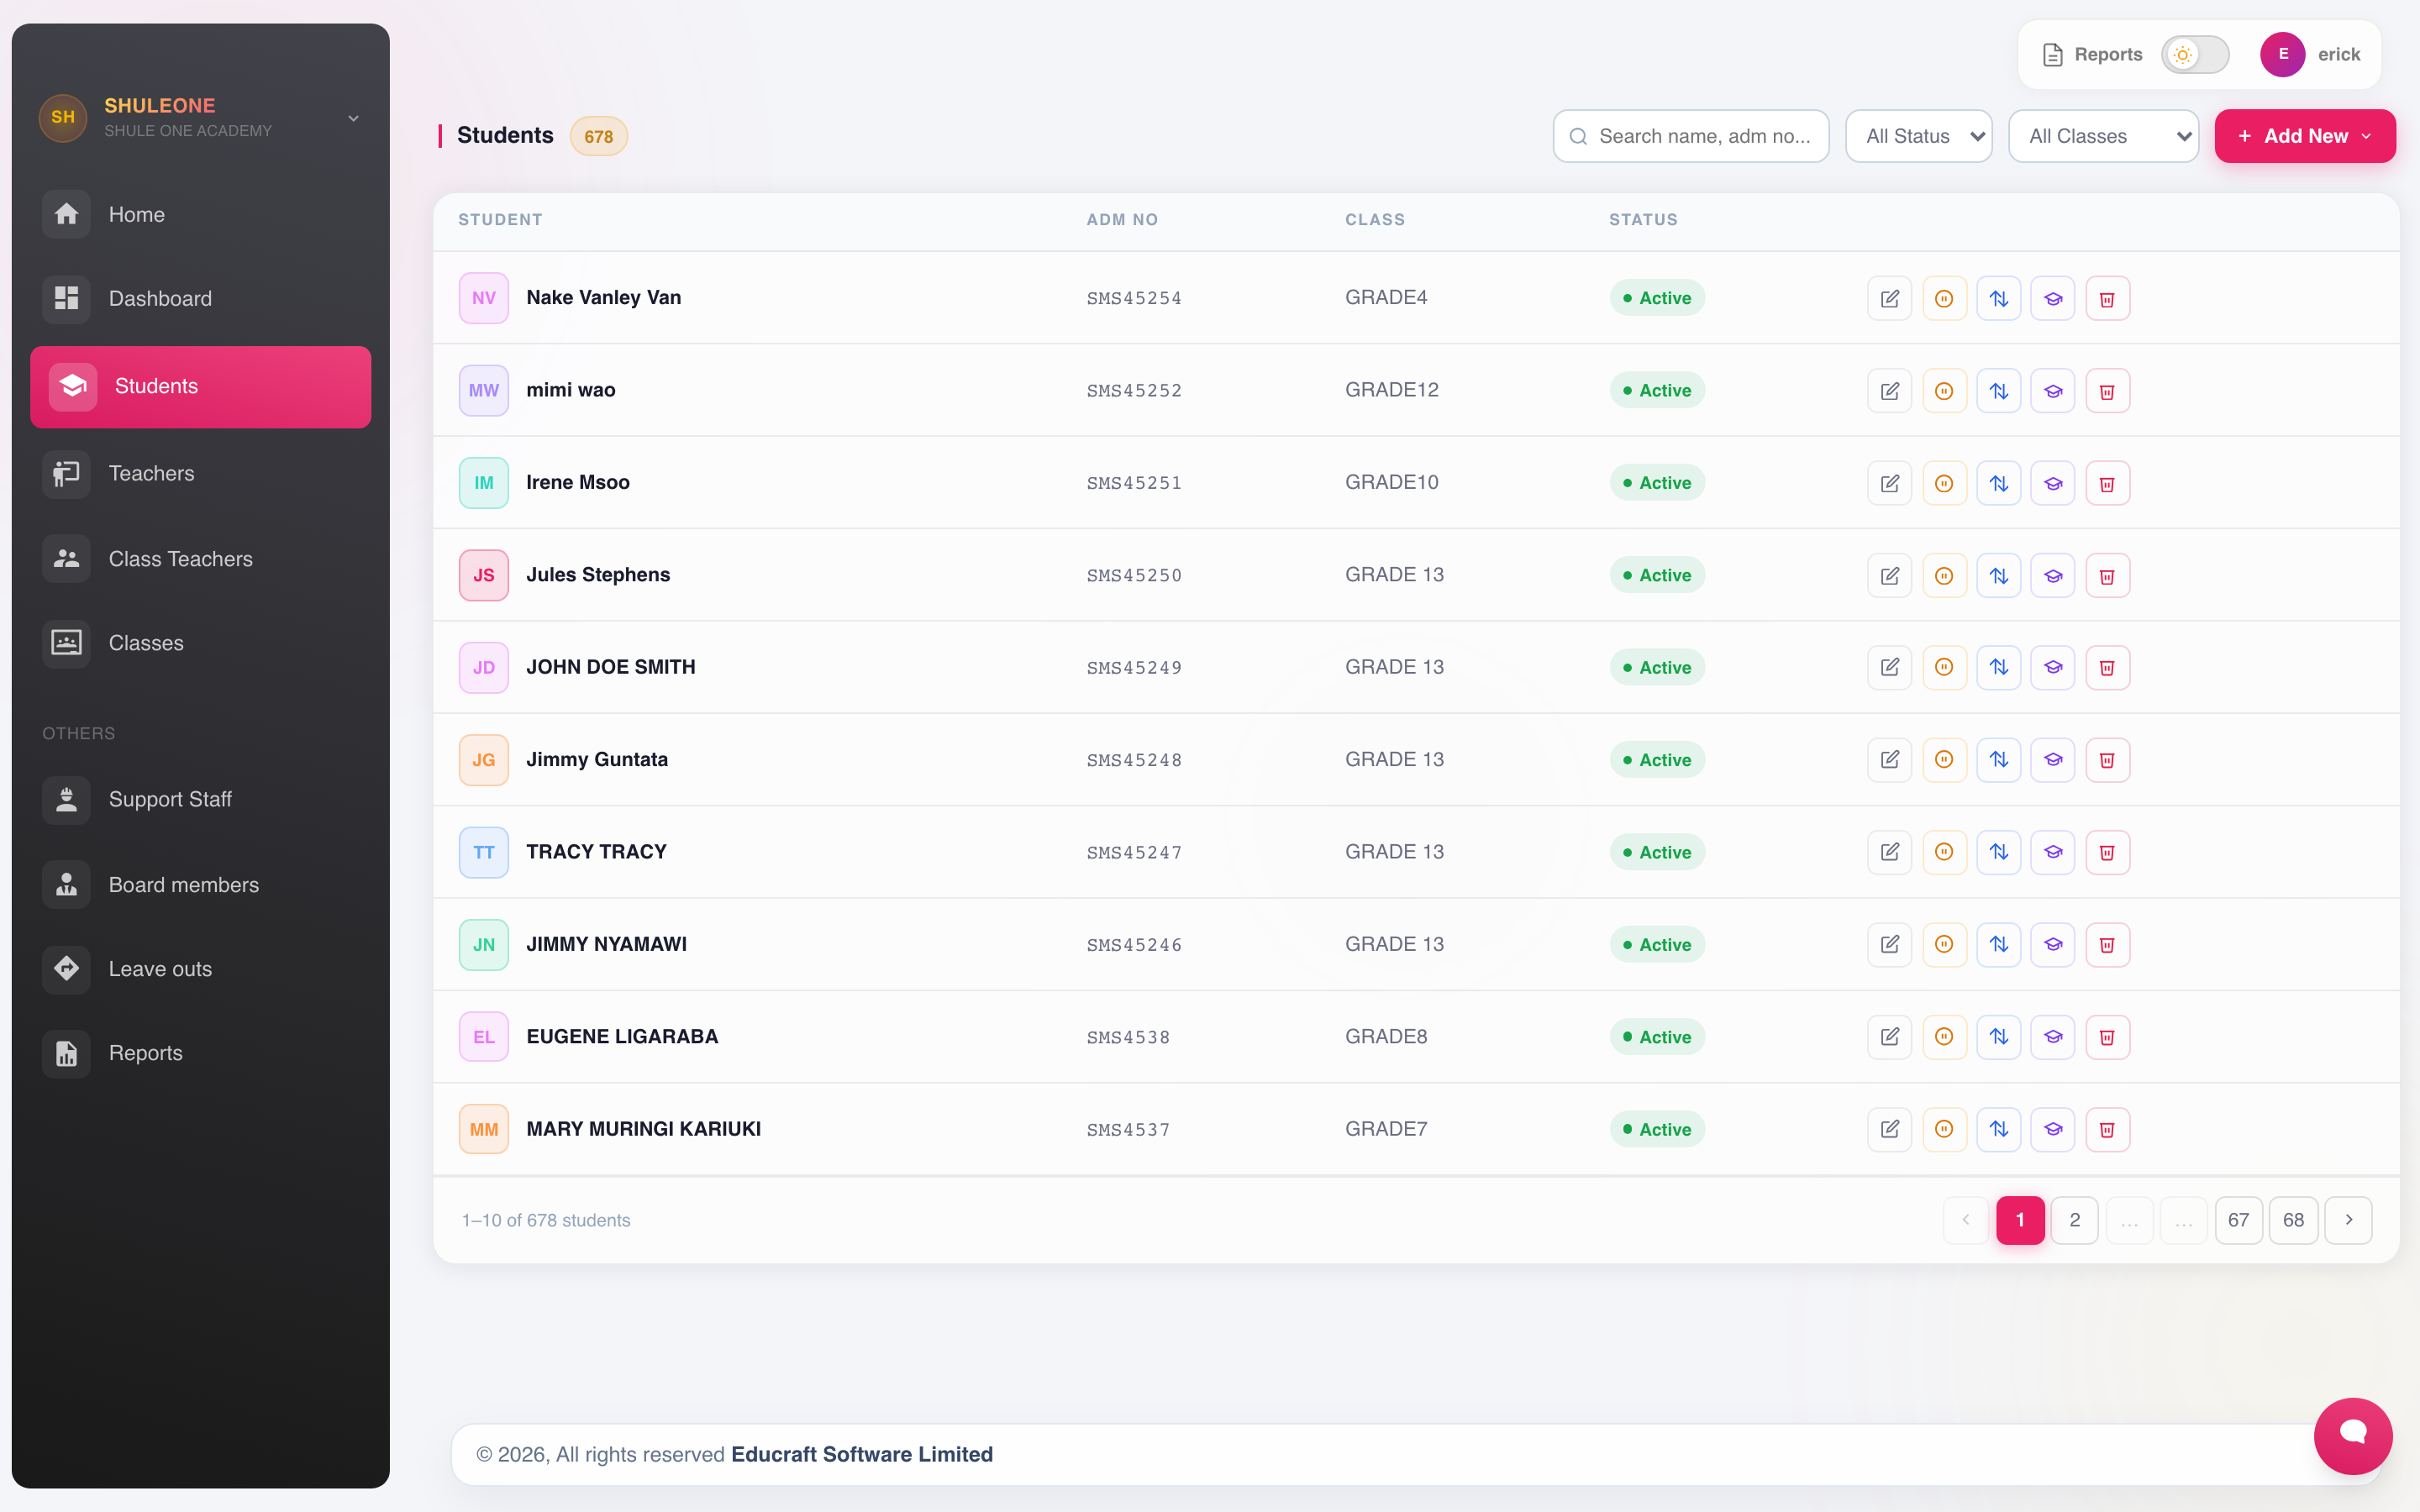
The current student list with class, admission and account status.
Admitting one student
Section titled “Admitting one student”Select Add New and work through the form:
Identification — admission number, full name, date of birth, gender. The admission number must be unique and is what appears on receipts, marks sheets and the student’s portal account. Date of birth is not optional in practice: it drives the age-appropriate theme in the student portal and appears on official documents.
Placement — class, stream and the term the student joined in. A student placed in the wrong class will be billed the wrong fees and appear on the wrong register.
Guardians — parent or guardian names, relationship, telephone and email. These determine who receives fee reminders, absence notices and results, and who can open a parent account. At least one working telephone number is essential; the telephone number is the parent’s portal username.
Other — boarding or day, house or hostel, transport route, medical notes, and any special needs.
Select Save. The confirmation shows the learner’s generated portal username. The student also appears on the register immediately and can be billed, marked present and issued books from that moment.
Importing a class from a spreadsheet
Section titled “Importing a class from a spreadsheet”For an intake, importing is far faster than typing.
- Select Import or Add by Excel.
- Download the template. Do not build your own file — the importer matches on column headings, and a file with different headings will be rejected or, worse, loaded into the wrong fields.
- Fill one row per student. Keep admission numbers unique and dates in the format the template shows.
- Upload the file. ShuleOne validates it and reports the rows it cannot read.
- Read the result as Added, Skipped or Failed. A skipped student already exists and must not be imported again.
- If rows fail, use the correction workbook that downloads automatically. It contains only correctable rows, keeps the original values and adds a Failure Reason column. Correct those rows and upload that workbook again. Use Download Excel in the result if the automatic download was blocked.
Existing students are not copied into the correction workbook. Their admission numbers already belong to records in ShuleOne, so review the named record instead of creating a duplicate.
Reviewing an import
Section titled “Reviewing an import”Open the import window and select Import history. Each batch shows the workbook name, who imported it, when it ran, and separate counts for added, skipped and failed rows. Select View details for the row-by-row result.
Use Roll back only when the wrong workbook was imported. ShuleOne removes only students from that workbook that are still safe to delete. Billing, marks, attendance, transport or other protected history blocks rollback rather than being erased.
Class lists
Section titled “Class lists”Registration → Classes shows each class with its student count and Next class, and gives you the lists you need to print. A class with no students is still shown, so you can review the complete promotion path before year end. Not set means the class must be corrected in Settings → Classes before promotion.
Lists are available as PDF for filing and as Excel for further work.
For a login handout, open Admissions → Reports → Class List, select the class and leave Student Username ticked. The report contains usernames only — never passwords. Use the parent’s profile to send the temporary password privately rather than printing one password for a whole class.
Group lists cover more than one class at a time — useful for a whole-year assembly register or a mass mailing.
Student ID cards
Section titled “Student ID cards”Registration → Student IDs produces printable cards from the photographs on the student records.
Students without a photograph print with a placeholder, so upload photographs before a bulk run.
Editing and leaving
Section titled “Editing and leaving”Open a student from the list to edit the record. Everything except the admission number can be changed.
Resetting one student’s portal password
Section titled “Resetting one student’s portal password”Open Admissions → Students, find the student and select More actions (⋮) → Reset
password. The confirmation shows the student’s username and the new default password,
1234@#. You can select a linked parent and tick Send login details by SMS. The SMS
includes the student’s username and password, ShuleOne Connect links for Google Play and
the App Store, and the web portal link. Confirm to replace only that student’s password.
The result tells you whether the SMS was sent. If you leave SMS unticked, share the
password privately. Ask the student to change it after signing in.
To send one password for a parent and all their active linked learners instead, use Send portal login details on the parent profile.
If a former student returns, readmit their existing record rather than creating a new one. Readmission preserves the student’s history. When guardian contact details have changed, clear or replace the obsolete link; a guardian who is still connected to another child keeps their parent access.
If saving reports a duplicate parent/guardian contact link, the same legacy contact is recorded under more than one role, such as both Father and Guardian. Note the student’s admission number and ask support to repair the duplicate contact link before trying the change again. Other student details are not saved while that conflict is present.
When a student leaves, do not delete them. Deleting detaches their fee history, marks and library record, and the school still needs those. Instead:
- Transfers — for a student moving to another school, record a transfer. This closes their place, keeps their history, and produces a transfer document.
- Leave-outs — Registration → Leave-outs records students who have left without transferring.
Both remove the student from active registers and billing while keeping the record searchable.
Promoting students at the end of the year
Section titled “Promoting students at the end of the year”Classes stay where they are; students move up through them. At year end use the promotion tool from Registration → Classes to move a whole class into the next one.
Before promoting:
- Finish the term’s marks and generate report cards — promotion changes which class a student’s records sit under.
- Deal with leavers and transfers first, so they are not carried into the new year.
- In Registration → Classes, check the Next class column from the first class to the final class. Correct Not set or wrong destinations in Settings → Classes.
- In Settings → Classes, mark the graduating class as Final class and confirm that its Next class is Alumni.
- Decide on repeats. Students repeating a year are left where they are while the rest of the class moves up.
Select Promote All, choose the graduation date and confirm. ShuleOne validates every active class before it changes any student. If one destination is invalid, the entire promotion is denied and the message lists the classes that need correction. Fix those classes and try again; do not work around the warning by moving students manually.
After promotion, check the Alumni row and a sample of the other classes. The final class should have moved to Alumni using the selected graduation date.